I’m actually a carpenter by trade but have been off the tools for quite some time, so it’s been nice to dust off the carpentry skills. I am using the following materials for the timber construction.
MATERIALS
– 70mm x 35mm framing timber
– 12mm Ply. (I am using a higher grade than what is really required but I prefer using better materials)
– 10G 65mm Chipboard screws to fasten the framing timber together
– 8G 35mm Chipboard screws to secure the ply to the timber framework
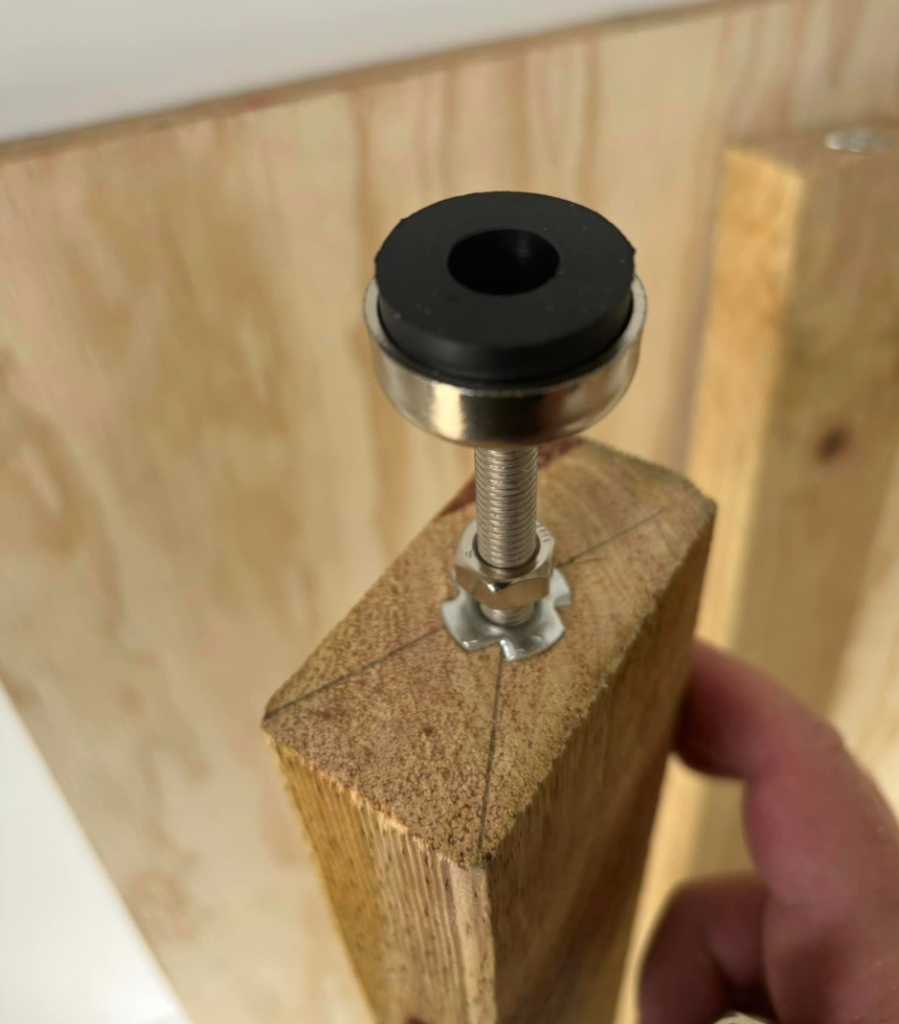
– 50mm M8 levelling feet for each leg
– M9 Tee nuts so the levelling feet can be screwed into the timber
– M10 bolts to bolt each section together after being leveled
TOOLS
– Circular Saw
– Speed Square
– Measuring Tape
– Cordless Drill
– Impact Driver/Screw Gun
– Carpenters Pencil
– Drill bits (3mm, 8.5mm and 10mm)
– Socket set and shifting Spanner
– 1200mm spirit level
– Clamps
– Saw Horses
Having a saw table or bench saw would have made this somewhat easier, but the speed square and power saw will totally be sufficient for the timber being worked with.
Construction
It’s a pretty simple process really. My 6 sheets of ply were 1200×1200. I ripped four of them in half to provide the 600mm sections, leaving two sheets intact to allow the track loops at each end of the dogbone. I clamped a length of the framing timber to the sheet at the correct offset from the saw blade to the foot of the saw to run the saw against. This ensures the cut runs up the centre in a neat fashion. If you are doing this use a very straight length of timber or more ideally, a straight edge such as some sturdy, boxed section of aluminum.

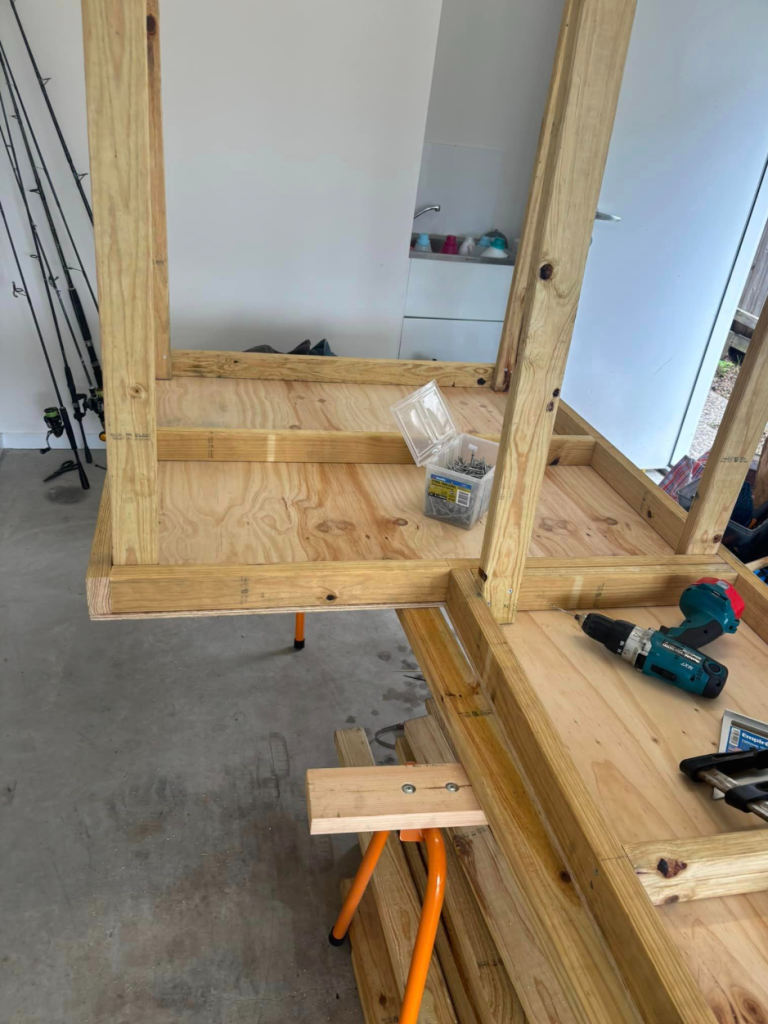
I assembled the framework on saw horses, screwed down the ply before flipping the benchtop upside down to install the legs and leg bracing.


The legs were cut at 1190mm, giving the layout approx 1200mm to the top of the ply. This will be getting 30mm XPS foam sheet glued to the top. I am 6 foot tall so I feel this height will be good for me.
The bottoms of the legs had an 8.5mm hole drilled and the Tee Nuts hammered into place, this then allows for the levelling feet to be screwed in.

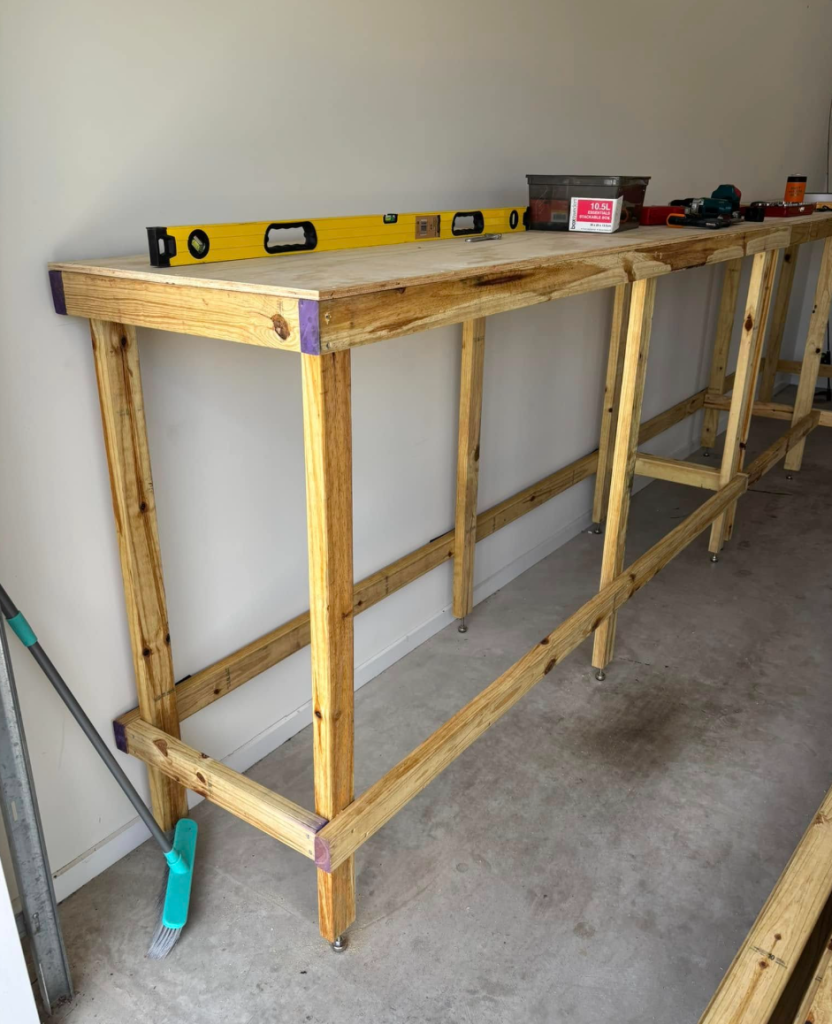
Bracing on the legs was placed measuring down 900mm from the underside of the ply and screwed into place. Then we just put some sticky foam backing on the rear to protect the walls, move into place and level the module.

Once the next module was built, it was moved into place, leveled and clamped to the first and then two M10 bolts used to bolt the modules together.

I have one more module to construct and then the three remaining will be moved into place, leveled and bolted together.